Tombs of Amascut (ToA)
Wardens Guide
This page details how to fight the Wardens in Impact MMO, including gear setups, invocation recommendations, and a detailed phase-by-phase guide.
How to get there
Use the tree at ::home at select the option for Tombs of Amascut.
Gear/Inventory Recommendations
| Setup | Description | Image |
|---|---|---|
| 1 | High-level setup (Best in Slot) (add dds if not doing 600s) | 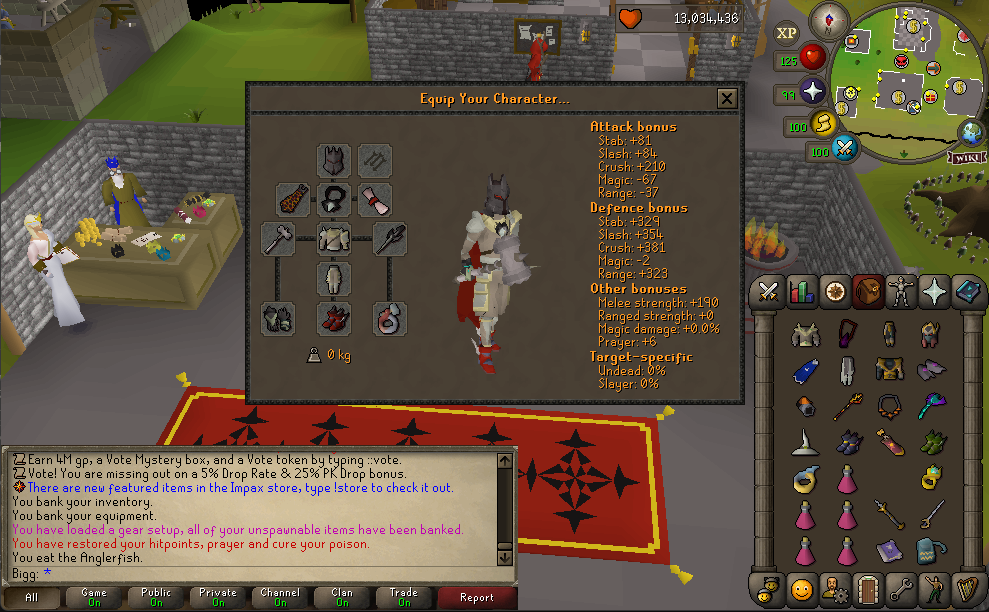
|
| 2 | Med/high-level setup (add dds) | 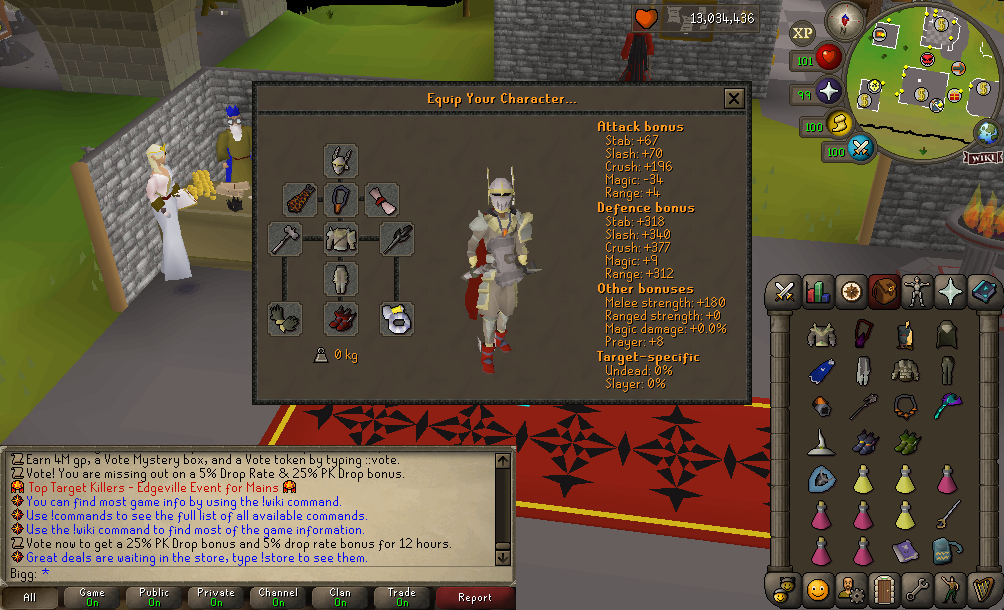
|
| 3 | Med-level setup (add dds) | 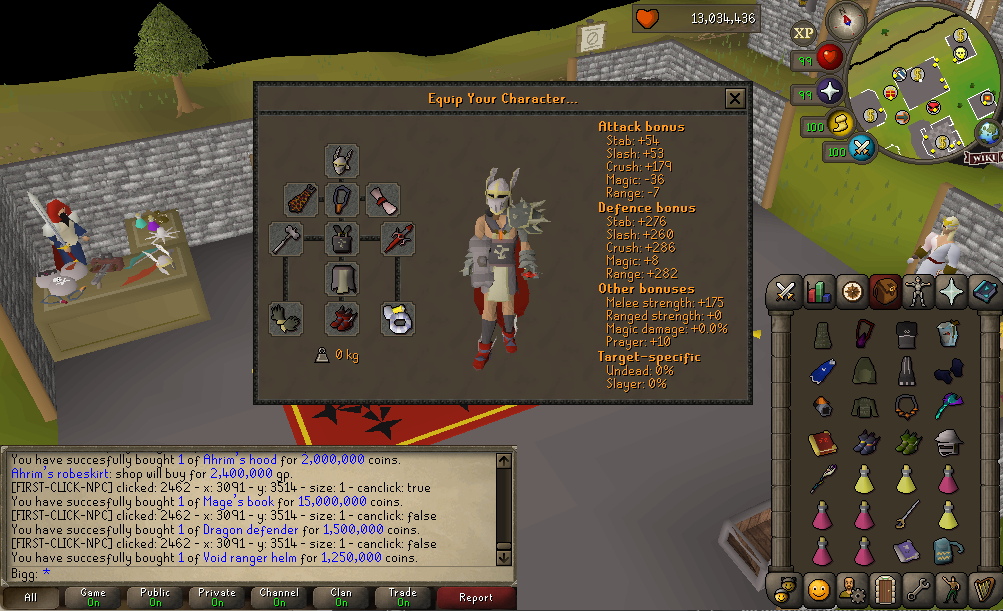
|
| 4 | Budget Void setup | 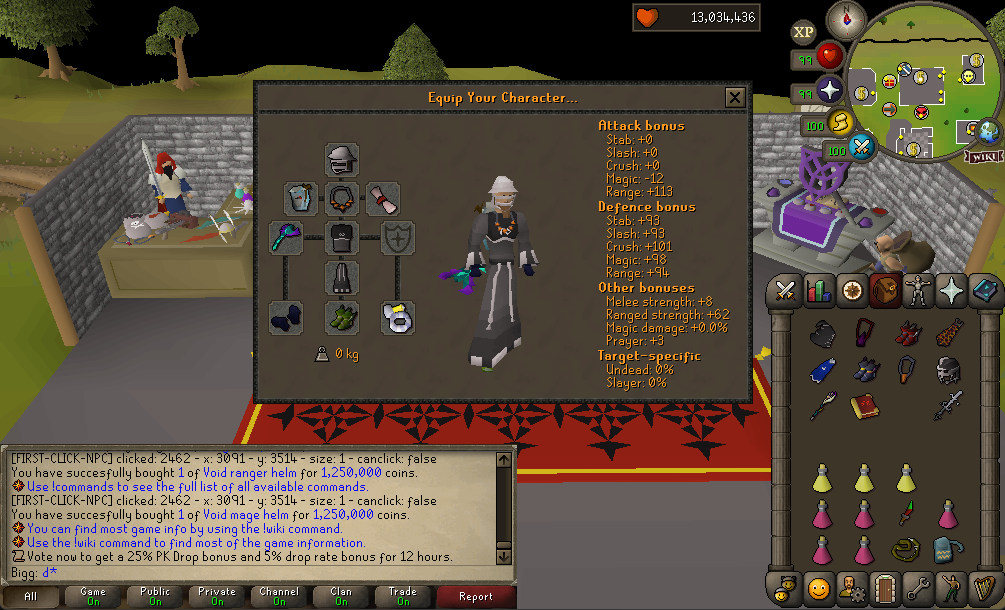
|
Invocation Recommendations
- 150 Invocation
Sprint for it, Quiet prayers, Deadly prayers
- 300 Invocation
Sprint for it, Quiet prayers, Deadly prayers, Ancient haste, Acceleration, Penetration, Overclocked, Overclocked 2
Alternative with insanity on:
Jog for it, Quiet prayers, Deadly prayers, Overclocked, Overclocked 2, Insanity
- 450 Invocation
Sprint for it, Quiet prayers, Deadly prayers, On a diet, Ancient haste, Acceleration, Penetration, Overclocked, Overclocked 2, Insanity
- 600 Invocation
Select all available invocations and 'Sprint for it' as the time requirement invocation.
Guide
Talk to the NPC next to the entrance before entering the area. If you are not doing 600s, pick the middle option. Pick the right option for 600s.
Phase 1
Start the raid and use a defence-lowering spec (SWH/DWH/BGS) on the obelisk after drinking 1 dose of Liquid Adrenaline (halves spec cost)
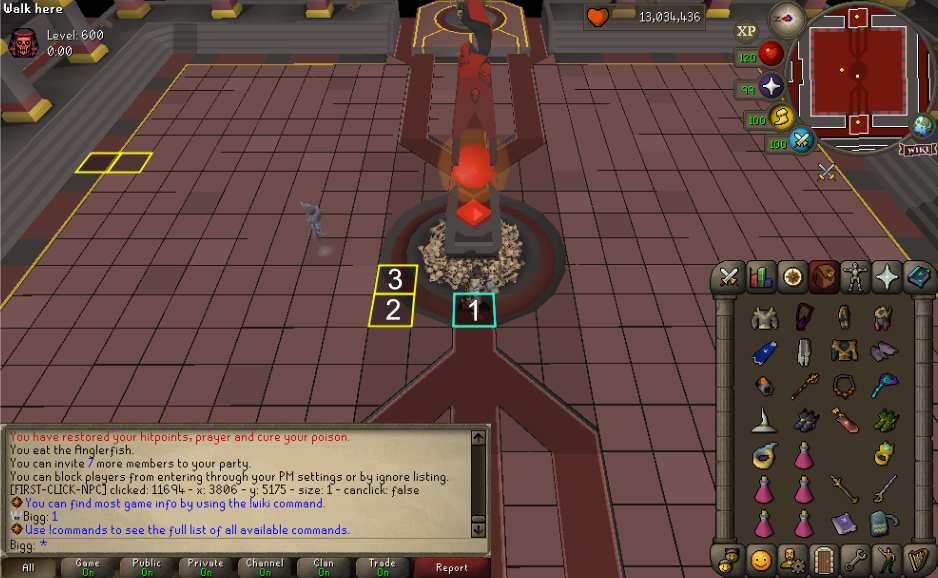
Switch to your range or mage set up (shadow is best, followed by blowpipe) and one player should block the obelisk on Tile 1 shown below for 30 damage before to Tile 2.
After taking 30 damage, move from Tile 1 to Tile 2. After the first set of UFO's spawn, move to Tile 3.
- If you are playing in a group, after the first set of red and yellow UFO's dd (i.e. everyone stands on the same tile) on Tile 2 to reduce the damage taken by the first orb attack. You cannot mitigate the damage for the second orb in a group or solo TOA.
Move between Tile 2 and 3 to avoid the UFO attacks until the Obelisk is dead.
Phase 2
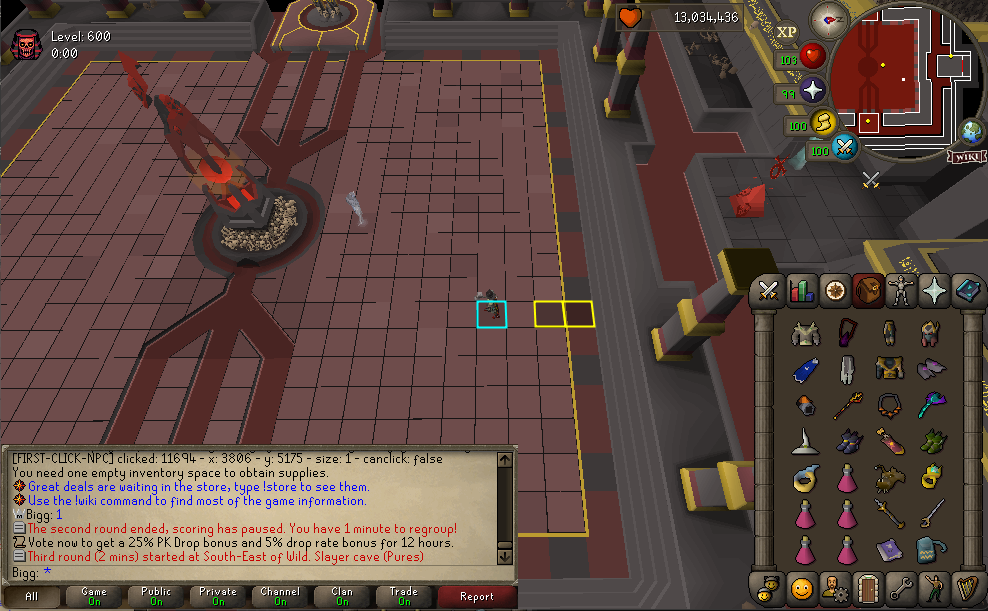
Stand on either of the marked tiles to avoid incoming attacks more easily.
- The Warden uses:
Red skull = Magic attack (pray Mage) Normal skull = Ranged attack (pray Range)
- Pray Melee when in melee distance.
Warden special attacks:
- Divine Projectile (55%+ HP): Disables prayers, then fires a red scimitar (melee), white arrow (ranged), or blue spell (magic). Use matching prayer.
- Imprisonment (<55% HP): Fires a dark shot at your last position. If hit, you’re frozen but can still eat/pray. Move between the two safespot tiles to avoid this attack.
Obelisk special attacks:
- Converging Beam: Two beams north/south, then east/west—stay in the opposite quadrant. Red lightning signals this.
You can avoid damage here by running through it when it is 2 tiles away from your position.
- Windmill Beam: Beams rotate clockwise; floor glows briefly before firing. Orange lightning signals this.
Stand on the two safe spot tiles to completely avoid this attack.
- Lightning Skull: Lands in a 7x7 area—two tiles in each straight direction are safe. Yellow lightning warns of this.
If you are within the 7x7 area, you can avoid damage by running towards the centre as it lands.
Wardens Core
Once the Warden’s HP reaches 0, its core emerges.
To kill the core in two cycles you need decent gear and it is recommended to follow this attack pattern:
- First time core is exposed
5 dds specs, 1 godsword/elder maul smack
- Second time core is exposed
2/3 dds specs depending on health, 4/5 hits with rapier or abyssal tentacle and end with a godsword/elder maul smack
If you don't have special attack, or are doing a 600 raid, just use your rapier or whip for 5 hits on the first core and then smack with a godsword or elder maul.
After this, you can hit the core 8 times every time it appears(including on the second time). Use 7 rapier/abyssal tentacle hits followed by a smack with a harder hitting weapon.
Phase 3
Warden can only damage players with floor slams.
Optional but recommended where possible: Use a defence lowering spec to start the fight.
Best weapons: Shadow > Twisted Bow > Blowpipe
Slam pattern: right of centre → left of centre → centre (repeats).
After every set of skulls, the pattern for the floor slam attack will reset, unless you have activated the insanity invocation. When this invocation is activated, the pattern continues from where it left off before the red skulls spawned.
Red Skull Attack
Equip a melee weapon and quickly destroy all red skulls to avoid massive damage. There is no hit delay when hitting the skulls.
Phantom Bosses
Phantoms of earlier raid bosses appear:
Phantom attacks:
Akkha: Magic and ranged attacks.
The spike is a ranged attack and the red projectile is a magic attack.
You can see when Akkha is going to switch combat style as he will hit his staff onto the ground before switching.
Kephri: Magic fireballs
A shadow appears under your character and you have a second or so to move off the tile to avoid the projectile as it hits your original position.
Enrage Phase (~5% HP/roughly 100hp)
- Warden heals 20% and gains high defence.
- Red lightning strikes random tiles—watch for shadows.
- Phantom tears floor tiles away, forcing players forward (i.e. closer to warden).